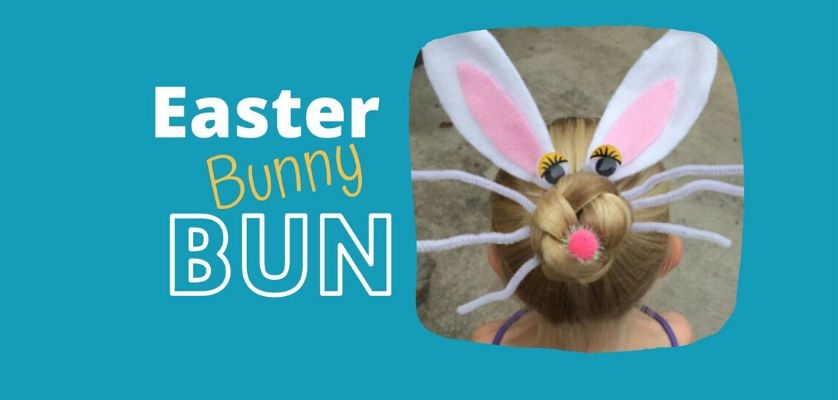
We love all things Easter and the same can be said for super fun hairstyles!
We have combined the two and created this tutorial for an Easter Bunny bun hairstyle. Not only is it super cute but its nice and easy to do also. Win Win!
What You Will Need – Easter Bunny Bun
- Scissors
- White & Pink Felt
- White Pipe Cleaners
- Large Googly Eyes
- A Pink Pom Pom
- Bobby Pins
- Hot Glue Gun
All of the items listed above can be purchased from Spotlight
How To Make It – Easter Bunny Bun
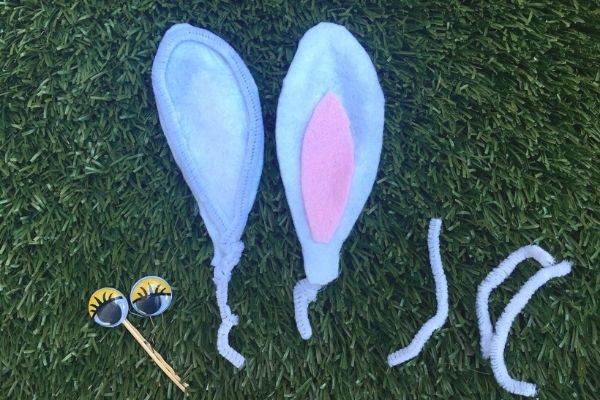
Ears
Firstly you will need to make the bunny ears for your Easter Bunny Bun. Take your white felt and cut out the shape of a bunny ear using the scissors. Use your hot glue gun to glue a pipe cleaner around the edge of the ear to stabilise it. You can see how it’s done in the image above. Then cut out the inside of the ear in the pink felt and glue it to the ear. Repeat to make the second ear.
Eyes & Nose
You will need to glue the googly eyes and the pink pom pom to bobby pins using the hot glue gun again. These are for the bunny buns eyes and nose.
Whiskers
You will need to cut the pipe cleaners into 3 equal lengths for the bunny buns whiskers.
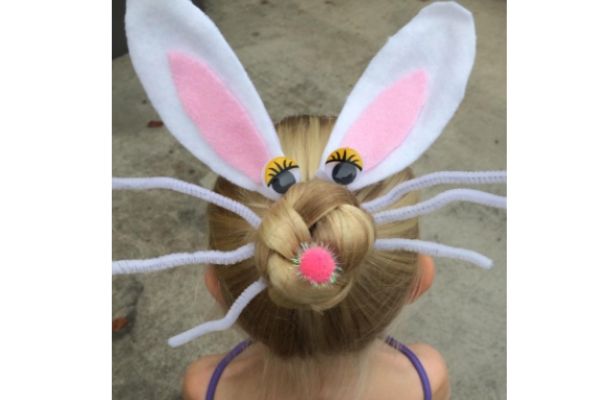
Putting It All Together
To put your Easter Bunny Bun together you will need to start with a simple ballet bun. The bun itself doesn’t have to be too fancy.
Begin with the bunny’s ears and slip them into the top of the bun. The ears may also need to be secured with bobby pins to keep them in place
Next, place the bunny’s eyes into the top of the bun just in front of the ears. Then add the bunny’s nose into the middle of the bun.
Finish off by sticking the bunny’s whiskers into either side of the bun and, there you have it all done!
We hope you love our Easter bunny bun and give it a try yourself. If you do we would love to hear what you think in the comments. For other Easter related blog topics click here.